Attempting Choso's blood-style makeup is one of those cosplay choices that looks spectacular in photos but can be deceptively challenging in practice. I've tackled this look a few times—both for shoots and conventions—and learned the hard way which shortcuts work and which create problems (hello, stained clothes and irritated skin). In this guide I'll walk you through everything I wish I'd known before my first attempt: prep, products, techniques, safety, and tips for long days under lights or in crowded halls.
Know the look you're aiming for
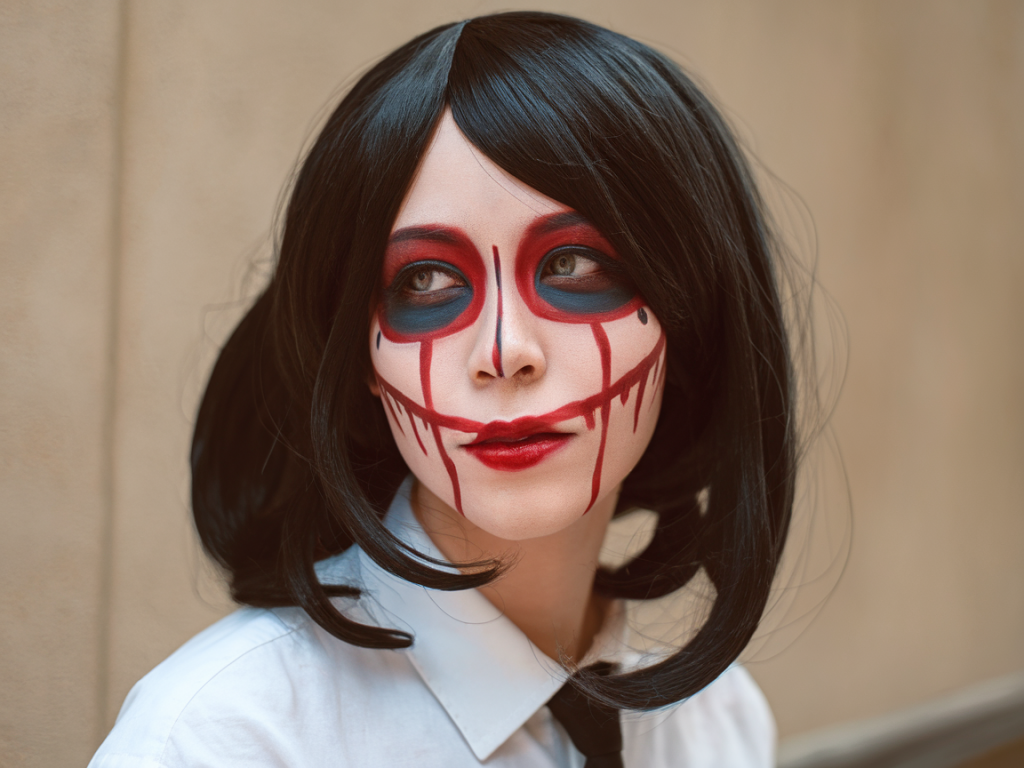
Choso’s blood-style makeup is distinctive because it’s simultaneously dramatic and messy in a controlled way. Think veins, drips, and splatters that feel organic rather than cartoonish. Before you pick up a brush, study reference images from multiple angles—the anime, official art, and fan shots. Decide if you want a hyper-real blood effect (think glossy red with depth), a more stylized flat red like the anime, or something in-between with visible veins and texture.
Skin safety first
Your skin should always come before accuracy. Choso’s look requires heavy use of pigments and adhesive for layered effects, so patch testing is essential. Apply a small amount of each product on your inner arm 24–48 hours before full application to check for irritation or allergic reactions.
For sensitive skin, opt for well-reviewed, hypoallergenic brands. I’ve had good experiences with Mehron Paradise AQ for face paint (it’s water-activated and gentle) and Ben Nye for prosthetic adhesives and stipple work. If you have reactive skin, avoid products with strong fragrances or isopropyl myristate.
Key products you should consider
Planning your layers
Choso’s blood-style look is all about layering: base color, depth, veins, and final glossy blood. Here’s the order I follow:
Techniques for realistic veins and drips
Veins should feel like they're under the skin, not painted on top. To create that illusion:
Costume and transfer prevention
One of the most common pitfalls is blood makeup transferring all over your costume or car seats. To minimize this:
Practical day-of tips
Conventions and shoots have different needs. For cons, prioritize comfort and longevity; for photoshoots, prioritize visual drama.
Removal and aftercare
Don’t rush removal. Use an oil-based cleanser or commercial adhesive remover to dissolve prosthetic glue and alcohol-activated pigments. Follow up with a gentle facial cleanser and a soothing moisturizer. I also like to apply a calming toner or aloe gel if I’ve had sensitive skin reactions.
Keep in mind that some pigments (especially bright reds) can stain. If you’re worried about staining hairlines or clothes, apply a barrier cream (like CeraVe or a silicone-based primer) at the hairline and along edges, and change into old clothes before removing the bulk of the makeup.
Practice makes perfect
My last and most important tip: don’t expect perfection on your first try. The first time I attempted Choso’s blood-style makeup I learned how different lights and camera settings change the look. Do a few test runs, take photos under the conditions you’ll be using (studio lights or fluorescent con panels), and tweak your palette and techniques accordingly. Over time you’ll develop your own shortcuts and favorite products that suit your skin and style.
If you want, I can share a step-by-step product list I use for my photoshoots or walk you through a quick beginner-friendly version of the look for your first attempt—just tell me whether you’re planning a con or a photoshoot and your skin type.